Creation of registration messages in the Web-client is done in the Preparation section. The section’s main form offers the several ways to create message drafts:
- creating an empty draft (Fig. 1.1);
- creating a draft based on a template (Fig. 1.2);
- importing message from file (Figure 1.3).
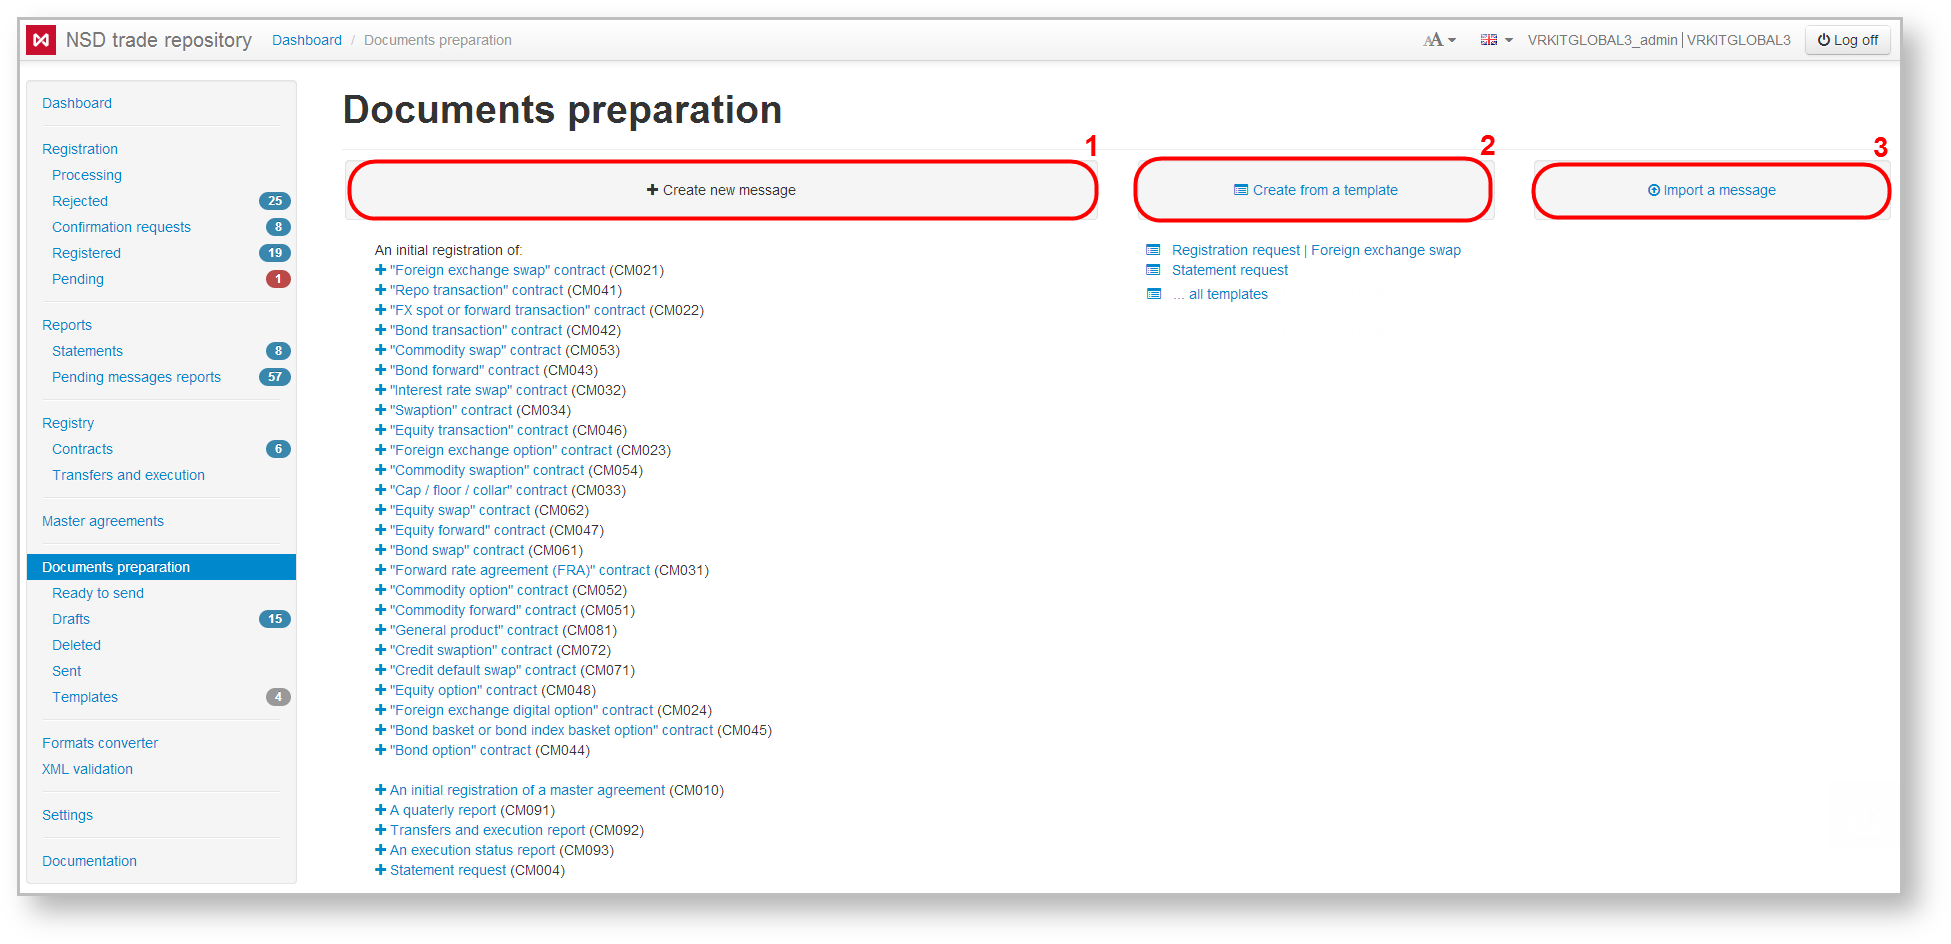
Fig. 1 – Preparation form
In addition, in the Web-client a draft is created through copying messages or registered contracts. The created message drafts are displayed in the Drafts form. At any preparation stage a draft can be:
- switched to the To be sent status;
- sent to the repository;
- deleted.
Fig. 2 shows a diagram of possible statuses of the draft message.
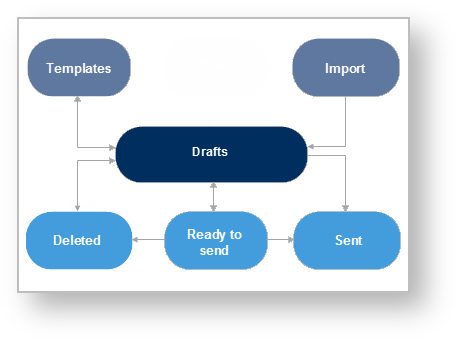
Fig. 2 – diagram of draft states
A method for creating a draft message depends on the type of message (product of the trade, initial registration or registration of changes, etc).
Creating a draft based on a sample order
The main page of the Preparation section displays a list of messages which user can create:
- messages for the initial registration of contracts and master agreements;
- requests for reports.
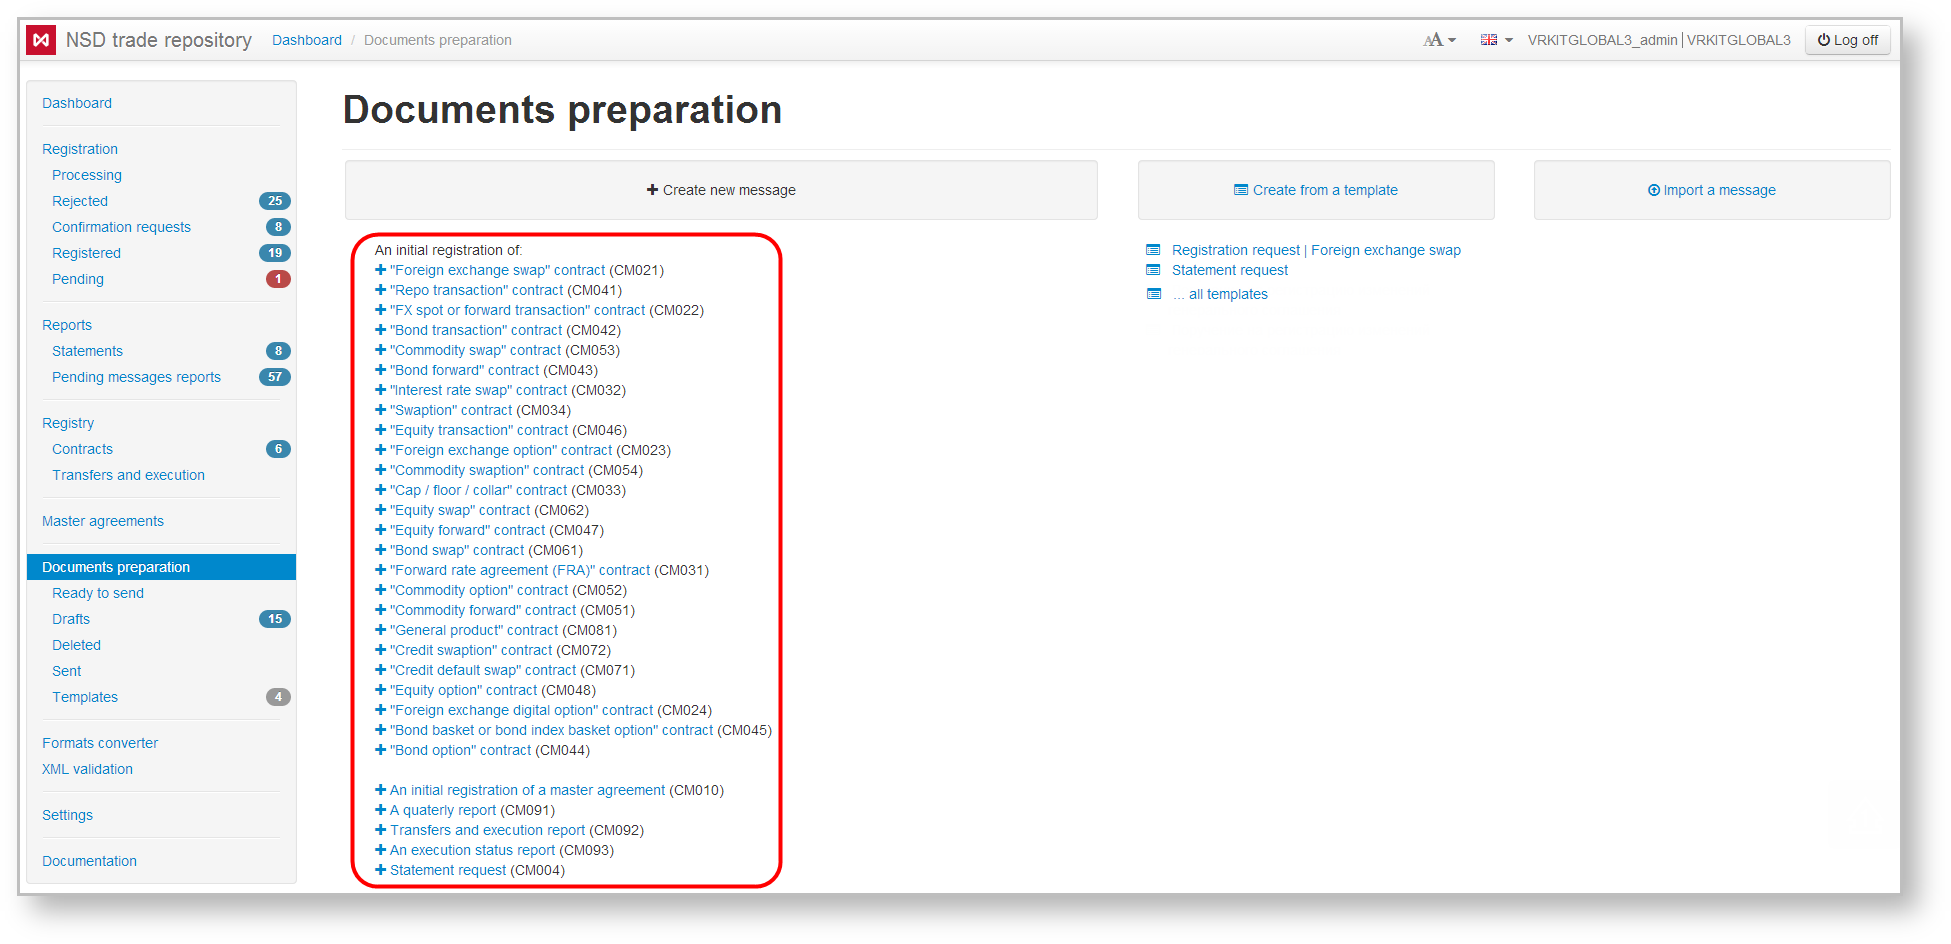
Fig. 3 – sample messages
Form code is displayed next to the document name
To create a draft you need to select the message from the list. A creation and editing form will open, where you should fill out the fields and save the changes. This will create a draft messages.
Creating a template-based order
The Preparation form displays a list of previously created templates (Fig. 4.1). Clicking on the template opens the message creation/editing form, where you can make the necessary changes and save. Documents created on the basis of templates are displayed in the Drafts form. Clicking on the Form sheet templates (Fig. 4.2) takes the user to the Templates form
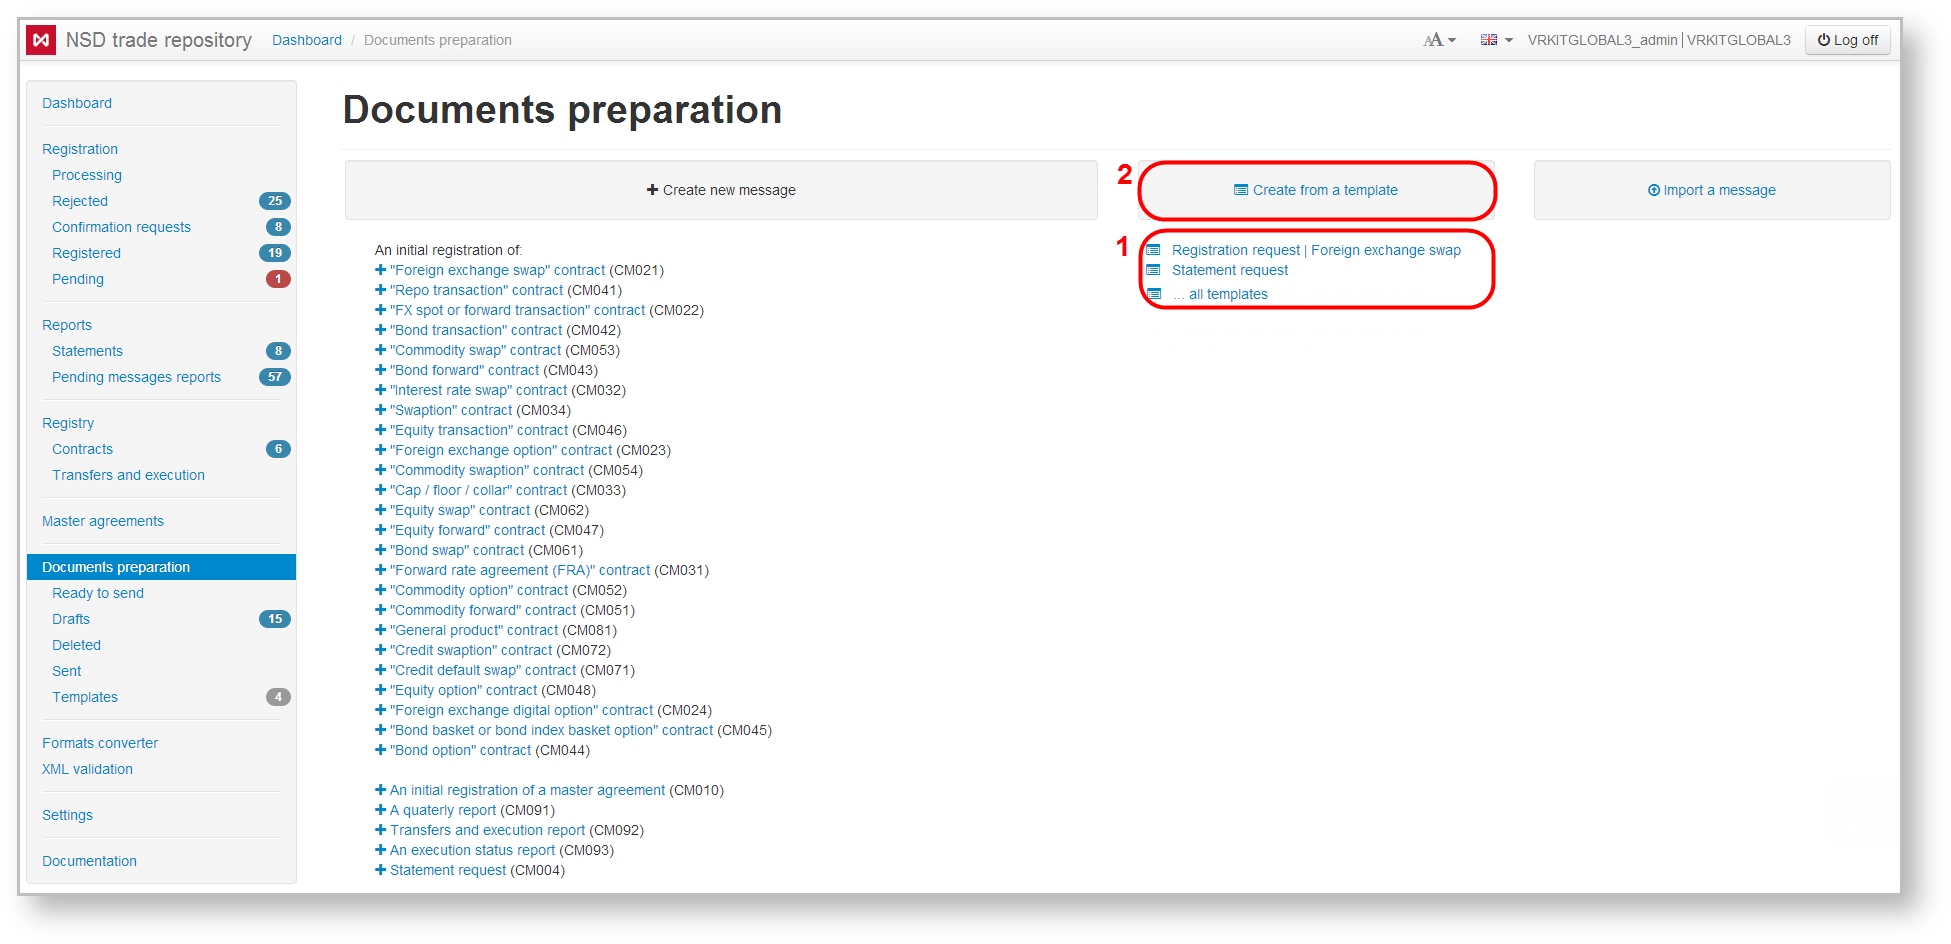
Fig. 4 – templates
For details on how to create messages templates, see Templates.
Import
Messages prepared by external systems, can be uploaded to the Web-client. Clicking on the Import a message button (Fig. 5) will take you to the Import form (Fig. 6). For the detailed description of the message import process see Drafts form.
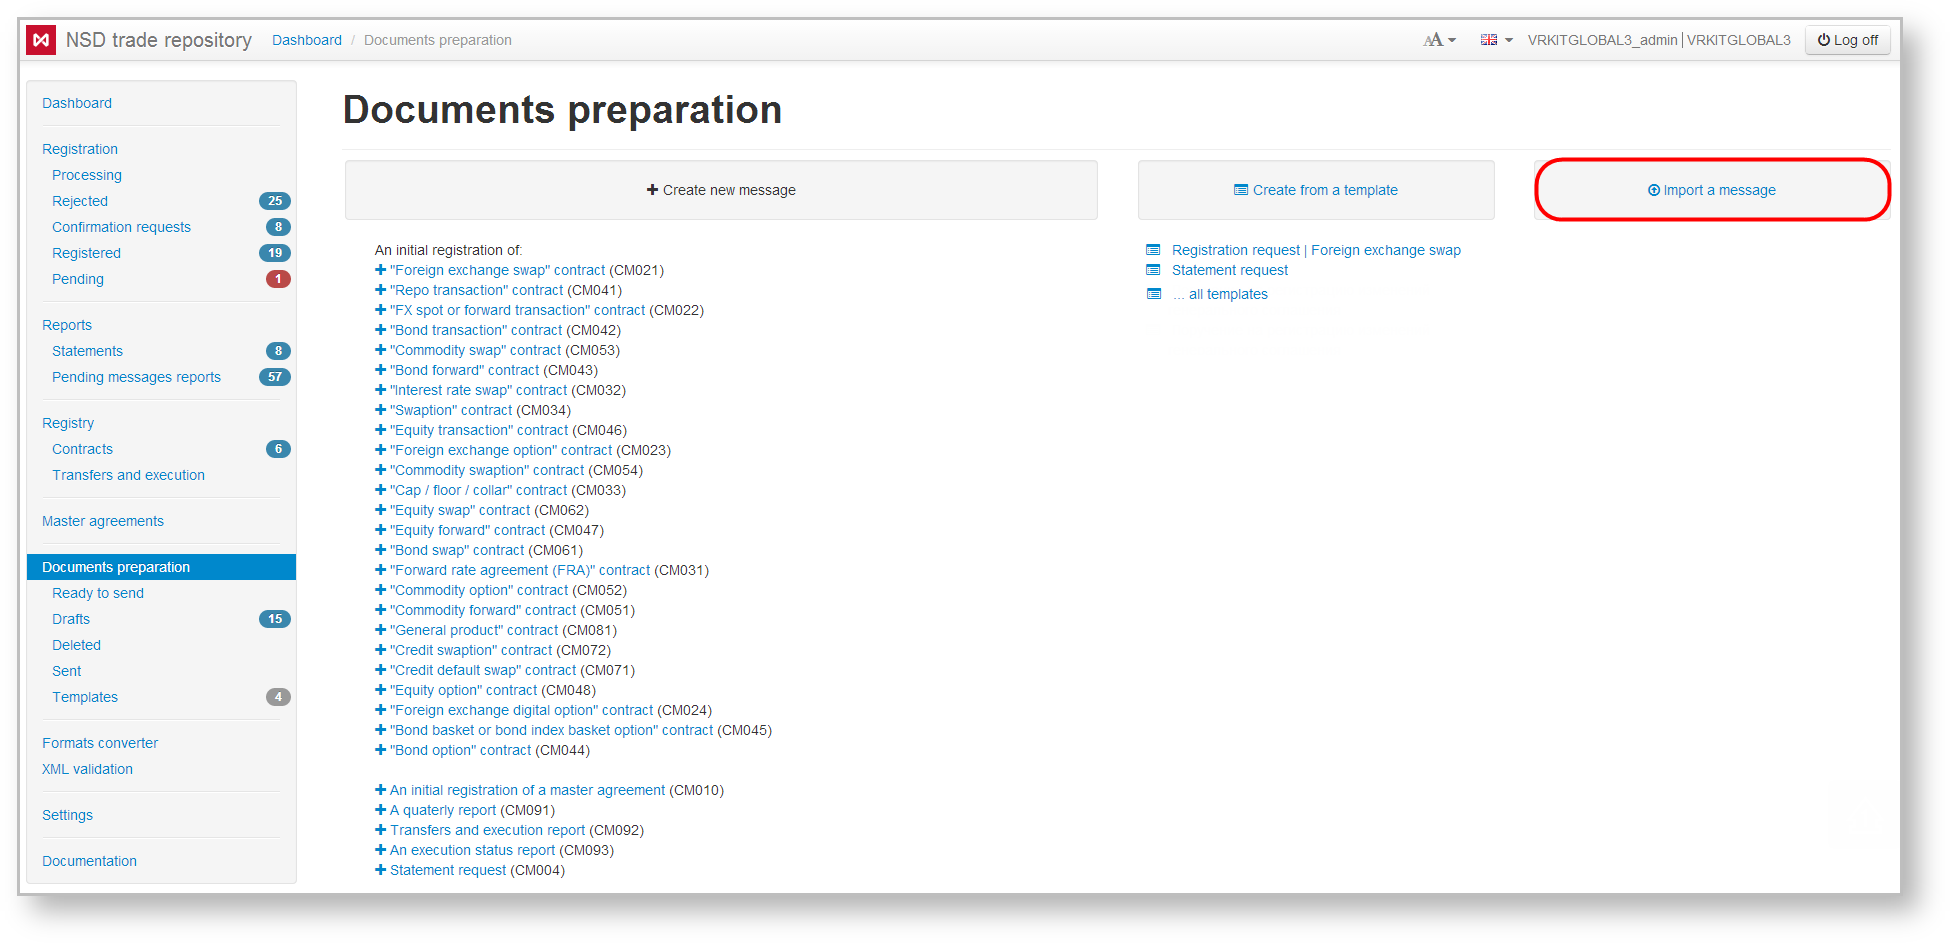
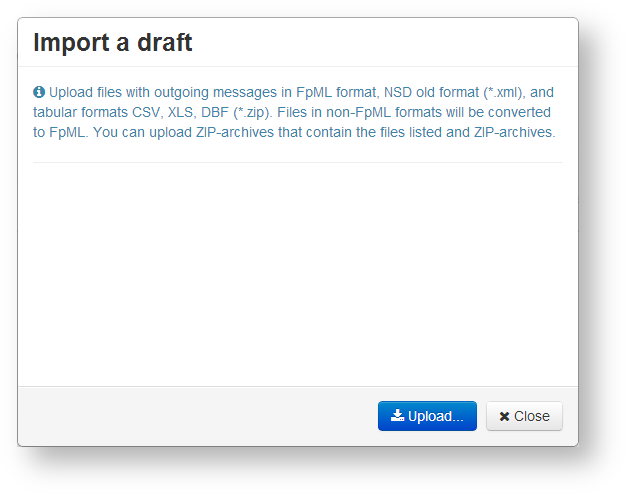
Fig. 5 – import Fig. 6 – Import form
Draft duplication
A created draft, regardless of the message type, can be duplicated by clicking  on the toolbar, which opens by hovering the mouse over the row in the draft table. Clicking on the button will take you to the creation and editing form, where you should enter data and save the changes. This will create a draft message.
Creating based on a message
Messages can be conveniently duplicated by creating drafts based on the previously sent messages. To create a copy of a sent message click  on the toolbar that will open when hovering the mouse over the row of the Registration and Reports form tables. Clicking on the button will take you to the creation and editing form, where you should enter data and save the changes. This will create a draft message.
Creating based on a registered contract
Similarly, you can create a draft on the basis of registered contracts. To do this, click  on the toolbar that will open when hovering the mouse over the row of the Registry table forms. Clicking on the button will take you to the creation and editing form, where you should enter data and save the changes. This will create a draft message.


